by Stan Logan | May 20, 2020 | Garden tools
Here’s some advice if you have a leaking pneumatic tire:
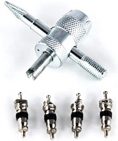
One of the four tires on my garden cart had a bad leak. Every time I wanted to use it, I had to add air. The next day it would be flat again. I assumed that the inner tube had a hole in it, so with significant difficulty, I removed the tube, added air, and submerged it in a bucket of water. To my surprise bubbles appeared not from a hole in the tube, but from the valve stem. I happened to have an extra valve, so replaced it. That solved the problem, but it would have been so much easier to test the valve stem before I went to all the trouble of removing the tube. So my advice to you is that if you have a leaking tire, fill the tire, and then place a drop of soapy water over the valve stem. If you are lucky, bubbles will appear and the fix will be easy. You can order a tool and replacement valves from Amazon Prime: Slime 20088 4–Way Valve Tool with 4 valve cores ($3.99)
Valve stems
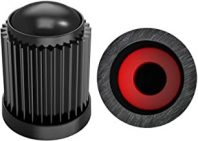
Now that I think of it, perhaps the reason that the valve went bad was that it had no valve cap. If that is the case also with you, you might consider ordering valve caps as well: Samikiva Black (30 pack) Tire Stem Valve Caps ($3.99) (Or you could call me—I have lots.)
I hope this solves your leaking problem.
Stan, The Tool Man
by Stan Logan | May 13, 2020 | Weeds
For some reason this year my garden has been under an intense attack of moss plants. I suppose the most likely cause is the drought we’ve experienced. Perhaps moss plants sense a coming doom and have sent out a flood of spores. Normally I blame unusual weed seed dispersal on my leaf blower, but moss plants are appearing where that cause is unlikely. What I’ve decided is the most likely hypothesis is the fact that moss plants are growing on the roof—particularly in the shade of our huge hackberry tree—and the spores are being spread throughout the garden by the wind.
I googled moss on roofs and learned that not only will moss plants tend to lift asphalt shingles, but also causes them to deteriorate. More research revealed solutions. There is a product called “Moss Out” that is designed to kill moss on roofs. I thought $20 for a bottle was a little much, but I bit the bullet. Before I applied a diluted solution, I spent two days scraping as much moss off the shingles that I could. The most effective tool for this task was my trusty 2 x 5 trowel that I keep urging you to buy. Then, using a hose, I washed the debris off the roof and collected the runoff in a rain barrel. This seemed to be far more logical than using my leaf blower. The moss plants are supposed to be first wet anyway. I then applied the solution.
I checked the roof several days later, and frankly, was not impressed with the results. Perhaps the moss was deader than it looks. It’s not as though it’s going to wilt or something. Not to be deterred, I moved on to the next idea: Apparently the metal zinc is toxic to moss plants. I have ordered a 50-foot roll of zinc metal sheeting. When it arrives, I will install it along the ridgeline so the when it rains, the dissolved zinc will flow over the moss plants and kill them. This is supposed to be a slow process and results may not appear for several months during the rainy season, but I am patient as well as persistent.
If you have experienced a similar attack of moss in your garden, you might simply need to look above you to find the source of the invasion.
Stan, The Moss Man
P.S. My wife insists on a disclaimer that I am not encouraging you to get up on your roof. You might instead hire a professional moss scraper instead.
by Stan Logan | Mar 19, 2020 | Garden tools
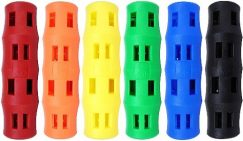
bucket handles
I hate to throw anything away. I go to extreme ends to fix something before I give up on it. For example, when the plastic handle surrounding the bail on a bucket starts to crack, I wrap layers of duct tape around it making last years longer. Recently I learned of a new device that solves this problem even better. Now available is a replacement handle that will snap around the bail when the old plastic handle gives way. The best feature is the fact that it is a larger handle that makes carrying thing even easier. If you google Amazon, you will see that “replacement bucket handles” come in a variety of colors for about $2 each. If you treasure your buckets as much as I do, I think you’ll give it a go.
Stan, The Tool Man
by Stan Logan | Mar 19, 2020 | Safe Gardening
Sooner or later you will injure yourself while working in the garden. This possibility is actually increased by the fact that if you are using a tool I have sharpened, it will be razor sharp. Your tender skin simply cannot resist the blade of a properly sharpened tool. If there is any consolation, you will be surprised at how painless the cut will be. You see, the sharper the cutting edge, the less nerve tissue damage there it. And it’s not just the tools that can hurt you. The garden is like a battle ground–with enemy thorns, rough bark, splinters, rock and concrete surfaces and just plain pokey branches just waiting for you to make just one careless move. You might win the war, but sooner to later you will lose a battle.
Now most of you will probably ignore the wound and continue your gardening chores. I, however, cannot. Any tiny skin puncture results a blood flow that simply won’t stop because of the blood thinner I take. So I have to go inside and apply a bandage. Here is where my advice comes in: Use Nexcare clear waterproof bandages. After washing the wound area thoroughly (do as I say, not as I do) and drying, apply antibacterial cream or ointment to the gauze pad, and stick on the bandage. Now you are literally covered for days. These bandages are unobtrusive and will remain stuck to you skin until you get around to finally removing it days later. And voila, the wound is completely healed. Now I realize that severe wounds are not treated just with a bandage, and although one of my sons swears by super glue to stick open wounds back together, you are going to have to use a certain amount of common sense in dealing with accidents in the garden. In any case, stock up your medicine cabinet with Nexcare clear waterproof bandages and a tube of antibacterial cream or ointment. You want to be prepared for that next accident that will occur.
Stan, The Tool(?) Man
by Stan Logan | Mar 19, 2020 | Garden tools
Plant Ties
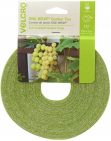
I’ll bet that you have a roll of green plastic tape in your garden supplies which you use throughout the year to strap up various plants as they grow. There is now a great product that can replace this product. It is Velcro tape. You can buy it in ½ inch wide rolls that are various lengths. For instance, at this writing, a 75-foot roll costs $7.69 which means, of course, that you a paying about 10 cents a foot.
So why would you use this Velcro tape rather than plastic tape. First of all, it is easier to apply. You simply cut off the desired length and wrap it around your plant and the supportive structure—no tying involved. Second, and most importantly, the tape can be reused. You are not cutting the plastic tape and throwing it in the trash. Now I will admit that it is task to save the tape for use the next time. You need to have some system of storing used tape. But that is the cost of reusing materials instead of dumping them into the environment.
If you are interested in this product, it is available on Amazon under “Velcro Brand One-Wrap Garden Tape”.
Stan, The Tool Man (article suggested by Janice)
by Stan Logan | Mar 19, 2020 | Garden tools
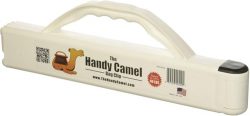
Camel Clip
OK, so this article is not about camels, but I thought it might get your attention.
I want to tell you about a tool that you might want to add to your arsenal. It’s called the “Handy Camel Bag Clip”. This device is a sturdy plastic clip that you can use to seal large bags—like fertilizer, potting soil, mulch, perlite, rock salt, pet food and bird seed. There is a handle on the clip that allows you to easily carry the bag. The “Giant” version can carry a 50 pound bag, and the regular model is for 10 pound bags. If you clip just the corner of an opened bag top, you can more easily pour contents into a container. Google “Handy Camel Bag Clip” for a demonstration.
Let me tell you why I personally value this tool. Have you ever opened a previously used bag of fertilizer and discovered after unrolling the top that the fertilizer was damp? I did. Damp fertilizer does not work well in spreaders. So I poured the damp mix into a tub and set it out in the sun to dry. The next day I had a tub of fertilizer soup. Many fertilizers are hydroscopic—that is, they love water—they will absorb it from the air. This is why I value a substantial bag clip that will seal off the air.
These clips are reasonably priced. You can order them on Amazon for about $10 for the giant version and $6 for the regular size. It is a tool that you can use over and over again, and I think it is a good investment.
Stan, The Tool Man (article suggested by Lorraine)
by Stan Logan | Mar 19, 2020 | Garden tools
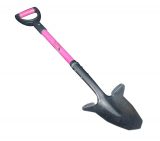
Another Shovel
“So why do I need another shovel?” you ask? Well, probably you don’t. But if your garden soil is hard, then you probably do. I’ve talked about the 2-tiner before. Remember that the advantage of having only two tines is that not only do they penetrate soil more easily, but they also make removing peripheral iris rhizomes easier. This new shovel is called a spear head spade. It has the advantage of a narrow, pointed head that makes it easier to dig into a hard surface. It is stronger than a 2-tiner which sometimes can have its tines bent when the soil is really tough. The base of the spade’s blade is still wide enough for your foot to get a good purchase. I think the cost of this spear headed spade is rather pricey, but it may be worth it and become your favorite tool. I would avoid the really short handled version—it wouldn’t give you enough leverage. Below is the model available from Amazon which is probably your best bet for $52. Google “spear head shovel” to see options.
Stan, The Tool Man
by Stan Logan | Mar 19, 2020 | Garden tools
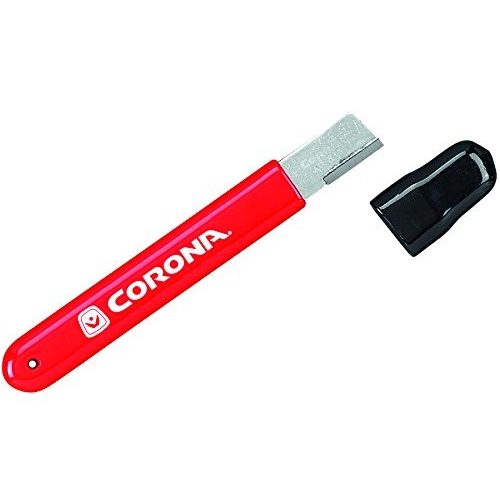
Sharpening Tool
I am really excited about a new tool that I just discovered. I was sharpening tools for the volunteers pruning the roses at the Sacramento Historical Cemetery, and one of the workers showed me a sharpening tool that I had never used. I had avoided it because it seemed like just a gadget too simple to be effective. But I tried it out on the spot, and it really works! This tool consists of a handle with a slim rectangle of carbide at the end. Even though the carbide has 90 degree edges, those edges are so sharp that they are able to shave off metal from the cutting edge of a pruner or lopper. Using this tool takes just a little practice, and I could show you the technique in few seconds if you end up buying one. So why would you use this tool instead of the metal file that I’ve touted before? Using a file is tricky because you have to stabilize the garden tool and then establish the proper angle with the file. Then too, sometimes there is very little space to fit a file near the hinge point of the blades. This new tool avoids these complications. It is such a small tool that it can easily be carried in your pocket if you want to sharpen your pruner on the job. So I think this tool should be on your must buy list if you like to keep your pruners and lopper sharp.
The Corona AC 8300 Sharpening Tool can be purchased on Amazon for $10.
Stan, still The Tool Man
by Stan Logan | Mar 19, 2020 | Garden tools
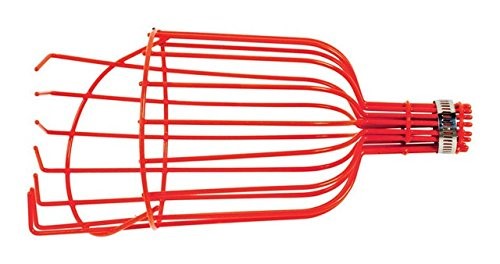
Fruit Picker Head
This tool article comes with a story:
Every time LaVille and I are at home for lunch we have a huge salad. It is basically a salad made with chicken and romaine lettuce. The chicken is strips of meat cut off a Costco rotisserie chicken. I call it “carcass chicken”. The final carcass, by the way, is never wasted. After 2 or 3 carcasses accumulate in the freezer, they are boiled in a pot that is first used to caramelize an onion and diced carrots and celery. While boiling, crushed pepper corns and celery are added. After 3 or 4 hours of slow boiling the mixture is poured into a colander and the liquid collected. After the liquid cools and is then refrigerated, the solidified fat is scooped off the surface. This chicken stock forms the basis for making various kinds of soups that are the mainstay of our evening meals.
But I digress—back to the salad: To the mixture of lettuce and chicken meat, we add a great number of things: chopped walnuts, raisins, Craisins , grapes which have been cut in half so they won’t roll off the fork, tomato, cucumber, green onion, red or yellow bell pepper, sliced boiled egg, apple, avocado, and mushrooms. Now, admittedly, not every one of these items is added every time, but what really adds a punch is pieces of fresh orange. Here’s the problem: All of the oranges on our orange tree have been picked . . . but there are still oranges on our neighbor’s tree and it is right next to the fence that divides our yards. I have found that the fruit picker that I bought at a garage sale years ago works really well to pick off one orange each day to add that extra treat to our salads.
Now if your neighbor’s trees are away from the fence, you should consider ordering a pole that is extendable. If you google “fruit picker head” on Amazon, you will find the basket alone costs only $8. It should attach to an old broom or mop stick. The extendable pole can be found at the same site for about $26.
If your neighbor’s trees are really far from the fence, I suggest you invest in a good 6 foot ladder and dark clothing for night time harvesting. A black hoody would be appropriate. I always prefer fiberglass ladders. They are more stable than aluminum and will last you a lifetime, which may be shortened if you slip and get impaled on the fence. That reminds me of our visit to Dracula’s Castle in Transylvania when we were learned about Vlad The Impaler—not a nice guy. But then that’s a whole different story that you don’t want to think about while eating your healthy salad.
Stan, The Tool Man
Addendum: You know, it’s rather embarrassing when you are trying to remove a stubbornly held orange from a neighbor’s tree, and the picker head comes off and hangs there like some sort of a weird out of season Xmas ornament. Make sure you tighten the hose clamp securely to your pole . . . or you’ll just be standing there with a stick in your hand . . . like I said . . . rather embarrassing.
by Stan Logan | Mar 19, 2020 | Garden tools, Irrigation
What can you say about hoses? That’s what I asked myself when it was suggested I do an article about hoses. I’ve been pondering this question for several months now. I have some thoughts that are possibly worth sharing . . . or not.
The most basic rule as with practically all things you buy: “You get what you pay for.” If you buy a cheap hose, you will likely have problems with kinking, the fittings will eventually leak, and the hose material will not bear up against the ravaging of the sun’s rays. Other than this obvious cost consideration, there are other decisions to make.
Most garden hoses have a 5/8 inch inside diameter. ½ inch hoses are lighter, have reduced volume flow, and are generally of low quality. How much length do you need? Most hoses are 50 feet long. I’ve noticed a long monster for sale at Costco.
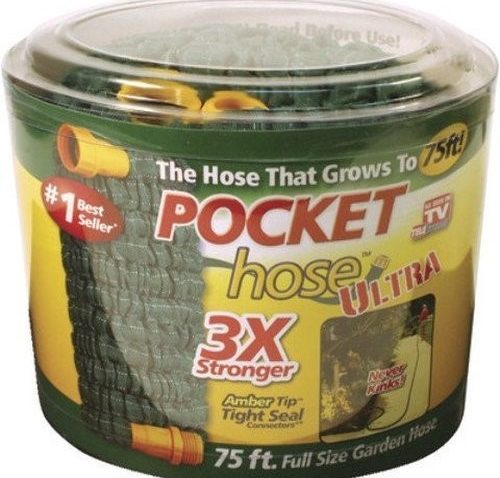
Pocket hose
You must have noticed the “Pocket Hose” or the other numerous expandable hose brands that seems to be the latest hot item on the hose market. You can find it for sale in a container about the size of a lunch box. You have to use one of these to appreciate them. It weighs almost nothing, so if aging muscles have difficulty dragging a heavy hose around, this may be the hose for you. You don’t have to worry about knocking things down as you drag the hose because it doesn’t ever lie in stiff loops on the ground. When you release the pressure, the hose shrivels up to almost nothing and can be stored in a large flower pot. However, these hoses are notorious for developing leaks in a very short time. They have come out with supposedly improved models. I have to admit that I bought one of these Pocket Hoses at Target because it was on clearance for $14—I can’t resist a sale. The regular price is over $30. You see, I had found a Pocket Hose at a garage sale months ago, and LaVille really loves it. It developed a leak next to a fitting, but I was able to fix it. I think it will be only a matter of time before her hose is a goner, but now I have a back-up. I figured that $14 for a hose that my wife loves for one year is worth it. If you choose to also gamble, don’t leave the pressure on after use. Also, stepping on it can result is premature death . . of the hose, that is.
Then there is the stainless steel hose that has recently appeared. If you believe all the hype, this is the hose of the future . . or not. Since I knew nothing about these hoses, I looked at the comments for the different models you can buy on Amazon. I hope you have used consumer comments to help you select products when you buy online. These comments are often very revealing and often amusing. Among the comments about these hoses were many complaints about the low volume flow and frequent leaks—but these varied a great deal from brand to brand. It once again revealed the fact that you get what you pay for.
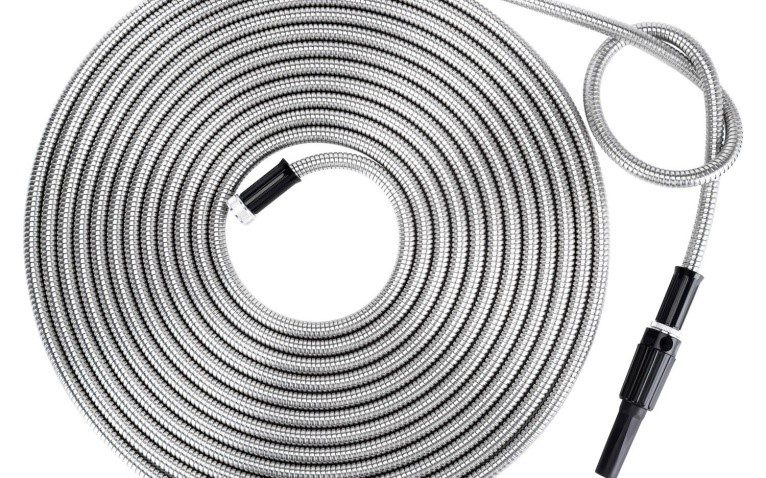
Steel Hose
How about coiled hoses? I hate coiled hoses. If they don’t result in premature death from tripping on them, they will cause a heart attack for all the stress they create when they get tangled or hung up on something. Volume flow is low. These stupid hoses do not last very long either. That being said, we have one of these . . I don’t know why . . except they do recoil into a relatively small space. Actually, my proof reader says she likes this hose and uses it more than any other hose. And here I was ready to pull out that Pocket Hose that I was saving for a leaky day.
Hope you’re a happy hoser,
Stan, The Tool Man
