by Stan Logan | Oct 22, 2021 | Design
If you are reading this article, you are probably of an age when you realize that life is short. To that end (so to speak) we gardeners must do all we can to surround our remaining lives with glorious plants. So when you decide that a plant in your garden no longer falls into the “glorious” category, grab your trusty spade and give that plant a good shovel pruning. Then, replace it with a new plant that will lift your spirits to a new level. However, limit your shovel pruning to your own yard. Your neighbors may not appreciate your efforts to improve their lives.
Stan, The Shovel Pruning Man
by Stan Logan | Aug 28, 2021 | Garden tools
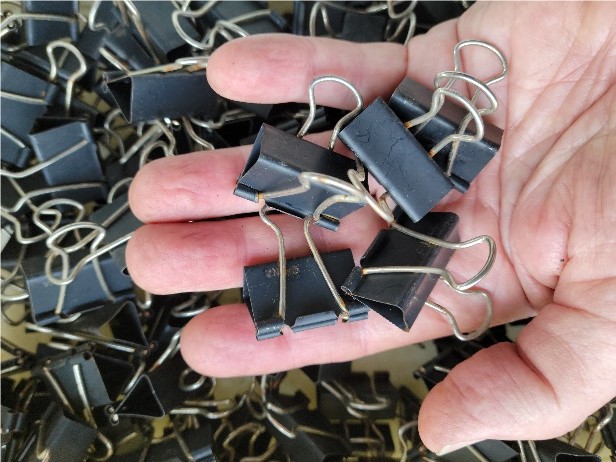
Well, if you don’t have a supply of clips, I certainly do! I have come into possession (trying to be vague here) of probably 100 stationery clips. I thought they would be useful for attaching photo labels at the upcoming Fall sale. Since Rise has been able to find some classy card holders for us to use, I have plenty of clips to share with everyone who can use them. You can see by the photo below how the clips could be used to seal a bag of garden fertilizer (remember my recent blog about fertilizer lumps?). They could also be used to attach plants to a structure—the clip would not have to pinch the plant. I am currently using clips to attach shade cloth to wire lines. Heck, you could use a clip to secure outgoing mail to your mailbox. Although these clips have a touch of rust on them, they have all been through the dishwasher, so they are clean enough to use in the kitchen to seal food bags. Right now, next to me, is a cupboard where I keep a huge bag of oatmeal that I get from Costco—sealed with a clip.
So, what I would like you to do in the next few days, is consider how you could use these clips. Then, when you grab and handful, let me know what you have come up with, and I can add an addendum to this blog. Help me out here—my editor says clips are boring.
Stan, The Blog Man
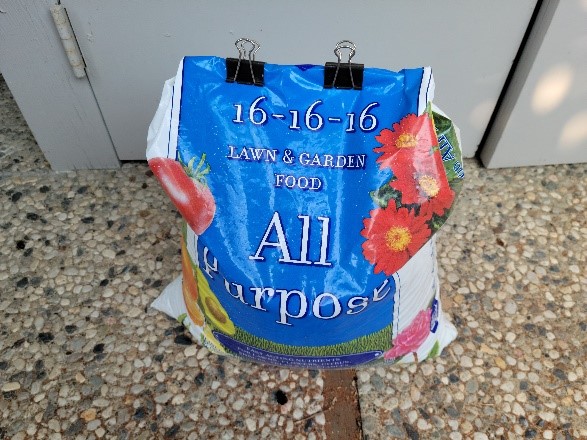
Stationery Clips repurposed to keep fertilizer from clumping
How many ways can you use stationery clips in your garden?
by Stan Logan | Aug 28, 2021 | Garden tools, Safe Gardening
Armed Conflict
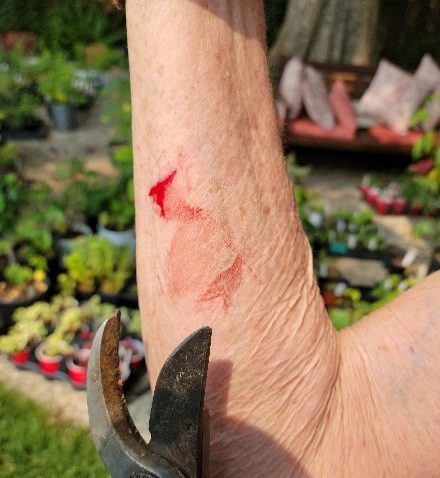
As the person who sharpened the tool shown, I feel it is my duty to warn you of a particular situation that may result in a wound like the one in the photo. It is important to remember that when yanking on plant material, that when that material comes loose, the grasping arm may suddenly fly backwards. If your other hand is holding a sharp object, that object may come into contact with said arm, resulting in skin penetration and a leaking of bodily fluids. To that end, please use extra caution when using one of the tools I have so thoroughly honed. It would ease my mind if you would create a first aide station in your back yard that would include a lot of bandages and perhaps a tourniquet.
Stan, The Concerned Man
by Stan Logan | Aug 14, 2021 | Weeds
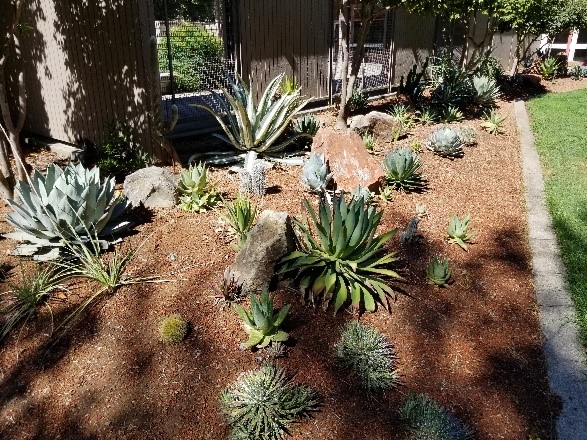
I recently drove to the Shepard to leave a set-up map of Iris Society rhizome sale for Lisa. (By the way, she is a wonderful person to work with. We are lucky to have her.) As I walked around the building to the mail slot in the front, I noticed how great a club-planted area appeared. The landscape display created by the Sacramento Cactus and Succulent Society is absolutely outstanding. They have set a really high bar. The garden out front that the Perennial Plant Club maintains is impressive too. But . . . the garden created by the Iris Club looked terrible. Magnolia leaves covered the ground, weeds were growing, and the irises needed cleaning up. You know, the money spent by the Shepard making the club signs was well worth it as there was no denying who was responsible for the mess. Whether you call it pride or peer pressure, I was embarrassed. So, several days later we gathered a work crew and cleaned up our assigned area and planted more irises. Then we spread a yard of mini bark to spruce things up. Hopefully our garden will still look good so you can appreciate it the next time you visit the Center.
Stan, The No Longer Embarrassed Man
Succulent Society Garden |
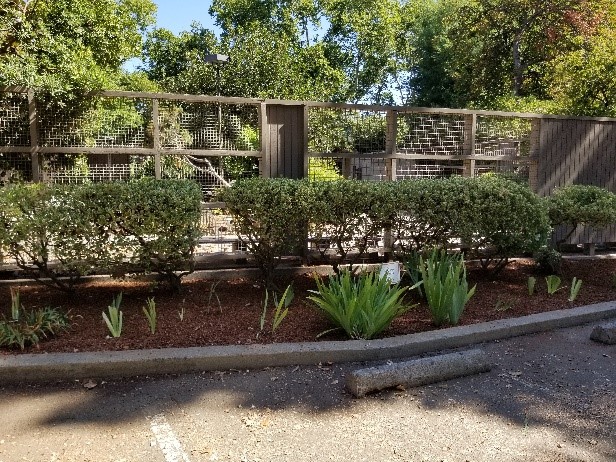 Iris Society spruced up garden |
by Stan Logan | Aug 8, 2021 | Fertilizer, Garden tools
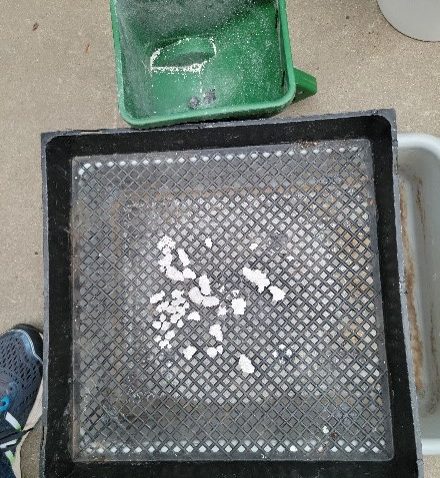
As I have mentioned before, one of the most common finds at estate sales is gardening chemicals. Just today, for instance, we picked up a big bag of E.B. Stones’ Sure Start. You can frequently pick up different fertilizers really cheaply. Often times when you come around to using this fertilizer, you will find them with numerous lumps that have hardened because the bag wasn’t securely sealed. These lumps are dangerous to use because they concentrate too much fertilizer in a small soil area and “burned” plants can result. If you save one of the plant nursery trays that are in a fine grid, you can use it to screen off those lumps. Then if you put those lumps on pavement, you can give them a good stomping to reduce them to a granular form. Sweep up the remains and you have perfectly good fertilizer.
We also keep a good supply of these small grid trays to shade new plantings. It seems that the new planting of irises always occurs during the hottest weather of the year.
By the way, I have heard that plants growers are shifting over to rectangular trays. So you might hop to it in your quest for an old square one that you can use as a sifter.
Stan, The Lumpless Man
Nursery flat used to sift fertilizer clumps
by Stan Logan | Aug 6, 2021 | Garden tools
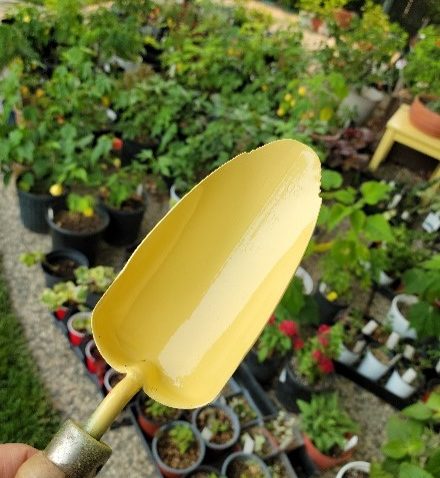
Have you ever lost one of your favorite gardening tools? If so, you know how upsetting that is. That was the state of my wife recently when she couldn’t find her favorite trowel. She had used it at the Rock Garden and then we remembered also at the Shepard on the same day. And now, it was nowhere to be seen. Which is exactly my point—the best insurance on your keeping a valued tool is that it can be seen. After days of fretting and searching where do buy another of the same kind of trowel, (the company Ultra Pro Garden Tools is apparently out of business) LaVille found her trowel amongst the mess on her potting bench. It was painted green and blended in with the litter.
So, for the second time, I am imploring you to take the time to brighten the appearance of your favorite garden tools. I’ve spoken to several gardeners who are using red spray paint—whatever suits your taste. The pain of losing a valued tool is severe, and possibly unavoidable with a little effort . . now! You know what they say, “Happy gardener—happy . . . “ What rhymes with “gardener”? . . . How ‘bout “pardoner”?
Yellow Trowel
Stan, The Happy Pardoner (LaVille says that “partner” would be more appropriate, even though it doesn’t rhyme as well)
by Stan Logan | Aug 3, 2021 | Garden tools
I love to sharpen tools—mainly because it’s so easy, but of course also because a sharpened tool works so much better. Years ago, my go-to sharpeners were a metal file and a whetstone. About 20 years ago, I discovered the angle grinder that was fantastic at sharpening larger tools and lawn mower blades. I have given a lot of demonstrations using a triangular file to sharpen garden tools, and that file is still the best for repairing pruner and lopper blades that have nicks. When a power source is available, a Dremel with a barrel stone can quickly remove a lot of metal if necessary. Several years ago, I favored the carbide sharpening tool that Corona puts out. Its main advantage is that it is so portable, but it requires knowing the technique of how to use it.
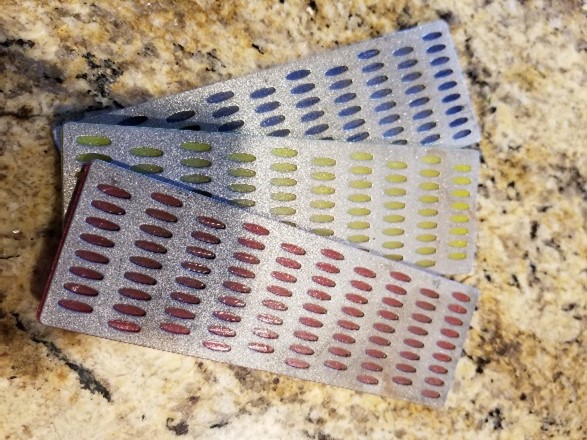
Today, my favorite sharpening tool is the diamond file. It has to be the easiest of all these tools to use. It behaves like a layer of sandpaper glued to a flat surface. You simply lay it on the surface to be removed and move it about. You can use a circular motion or straight-lined motion—it doesn’t matter—whereas a file has to be moved in a straight line forward only. Then too, a diamond file will work on hardened steel, whereas a metal file simply slips across the surface and the cutting edges of the file are ruined. Today I was at an iris dig where I was able to sharpen all the scissors that were being used. Now, the diamond file does not remove a lot of metal, so you wouldn’t want to use it for large tools like axes or shovels. But lighter tools like pruners, loppers, and household items like scissors and knives are so easily sharpened. The only challenge is holding the diamond file at an angle so that it matches the beveled edge to want to grind away. You can see if the angle is correct by where the metal turns shiny. The entire beveled surface should start to become shiny as you work.
You can test the sharpness of the tool by pulling your thumb across (not along) the sharpened edge. When the edge is sharp, it will grab your skin rather than just slip across it.
Amazon carries a great variety of diamond files, but most are narrow. For our sharpening needs, a large, flat file surface is best. I really like the files shown below which I bought at Harbor Freight. Having 3 different grits is very beneficial, and as far as I know, diamond files don’t wear out.
I really think you will appreciate your tools more when they are sharp, and diamond files make it such an easy and rewarding process.
Stan, The Tool Man
P.S. You will really appreciate your sharpened tool when you cut yourself. A sharp tool will damage fewer nerve cells and your cut will be practically painless. By the way, I have found that Shout prewash is really good at removing blood stains from clothing.
Diamond Files
by Stan Logan | Aug 1, 2021 | Garden tools
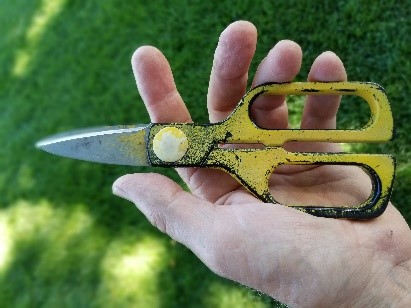
Have you ever asked yourself, “Why, of all the tools I own, do I most often lose the one tool that I value the most?” The answer, of course, is the reason that tool is most valued is because you use it the most. That point was brought to bare a couple days ago at the WPA Rock Garden. It was past noon and we were planning to leave when Marcia couldn’t find her Hori Hori knife. She found it several minutes after searching. It was laying on a wall in the shade and the dark blue handle did little to make it visible.
My suggestion to you is that you buy a can of yellow spray paint and apply it to that tool of yours that you are always losing. Now, granted, this application will not make its appearance more esthetic, but it will make it more easy to spot in that unexpected location where you chose to leave it. Case in point: the scissors pictured below are uglier than sin, but since I sprayed them with yellow paint, I haven’t lost it once. Then too, you never have to worry about someone stealing your tool when it looks like crap. I’m just sayin’.
Stan, The Loser Man
P.S. I would not suggest this technique for your gloves.
P.P.S. We went to Annie’s yesterday, and guess what LaVille bought? . . . a pair of yellow gloves.
P.P.P.S. Has anyone seen my phone?
by Stan Logan | Jun 30, 2021 | Fertilizer, Garden tools
I know you may not be willing to admit it, but I know there is a chance that you have Jobe’s fertilizer spikes. I can understand your reluctance to fess up considering the presentations that have been given by the perennial club. In June you heard a program on composting in which the use of chemical fertilizers was discouraged. Not too long ago, Pam Bone told you the uselessness of driving fertilizer spikes around trees because so little area of the root zone was affected. So, what are you doing to do with these things other than let the box continue to collect dust amongst your garden supplies? Well, let me tell you:
First of all, do you have the spikes for “beautiful evergreens” (16-4-4) or for “lush fruit & nut trees” (10-15-15)? This obviously will determine where fertilizer will be applied.
Second, do you have a hammer? If so, this is what you should do. Lay out a spike on a hard surface and beat it with the hammer. Your sidewalk out front may be a good place. You may gather a curious crowd of neighbors, who will immediately scurry off to seek out their own dusty box of fertilizer spikes. Now, you will find that bits and pieces of fertilizer will fly about and wearing googles is advised. It adds interest to the spectacle too.
Finally, apply the broken-up fertilizer bit to your plants. Now, here’s what I do with our citrus trees. I break the spikes into 4 pieces. I gather them into a bucket and walk amongst the trees and toss the chunks around the drip line of the trees so that whole ground area is evenly covered. I then take my hammer and bash them down into the soil. I time the application so that the soil is moist and soft, but not so moist that walking about compresses the soil. There is a pretty good layer of bark covering the ground, but I just smack the chucks down through it. I have to admit that I find this procedure rather enjoyable.
If you are applying the fertilizer to plants around your yard or potted plants, you will want to break up the spikes into much smaller pieces as I have shown in the photo. I used the chisel, but that isn’t necessary. LaVille has found it to be affective to shove small chunks down the sides of pots. You will have to decide how small the chunks should be and how much to apply, but then that’s the challenge, right?
So, what are you going to do with the mess of powdered fertilizer dust left on your sidewalk? Sweep it up and scatter it around your garden. On second thought, perhaps your front sidewalk is not the ideal hammering area as you wouldn’t want any fertilizer to end up in the gutter and on to our rivers and streams. You should probably do your spike bashing in the back yard. That way no one will think you are too cheap to buy a proper fertilizer.
But Stan, you say, why did you buy fertilizer spikes? Estate sales—I cannot resist a bargain. You would be surprised to see how many estate sales have dusty old boxes of unopened fertilizer spikes. Don’t let that happen at your estate sale.
Stan, The Hammer Man
by Stan Logan | Jun 26, 2021 | Garden tools, Weeds
Somehow it is ironic—instead of me describing a tool that I feel you need, but don’t have, here is a tool that you do have, but probably don’t need. Unless you have steadfastly held onto the eating habits of your Neanderthal ancestors, I’m betting that you have at least one set of eating utensils in your home. It is the dinner knife that I am singling out this time. I have found that this is the best tool for teasing out weeds from ground cover. Now, if you don’t have ground cover, stop reading and go out to your garden and do something useful—take a flashlight if it is dark.
Since you are still reading, you must have ground cover . . or are just too pooped to crawl out to the garden again. Now the term “teasing” is a biological dissection term for the act of carefully separating the organs of small specimens with pointed tools like probes or dissecting needles. Every time I use a dinner knife to tease a weed out of desired ground cover plants, I cannot help but be reminded of my first biology dissection where I cut through the dorsal surface of a preserved earthworm and teased through the connective tissue until I found the two lobed brain and the nerve cords that led down and around the pharynx. Hmmm . . . you don’t have those same memories
Back to the garden: The way you use your knife to tease is to grab the offending weed and pull gently while you work the knife down into the root area and move it about. If you are successful, the weeds will be extracted and the ground cover will remain intact. If you are unsuccessful, the stem of the weed will break off only to regrow when you aren’t looking. Now I will be the first to admit that this is not a pleasant gardening chore. You are on you hands and knees with you nose to the ground (not literally). Even using knee pads does not appease my knees which insist on complaining for hours afterwards.
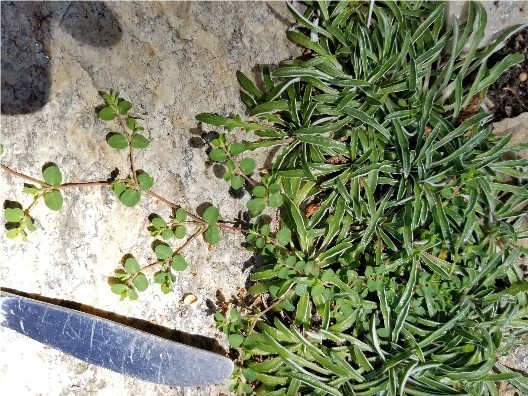
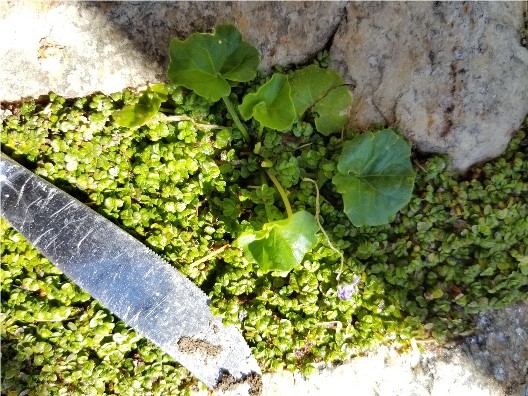
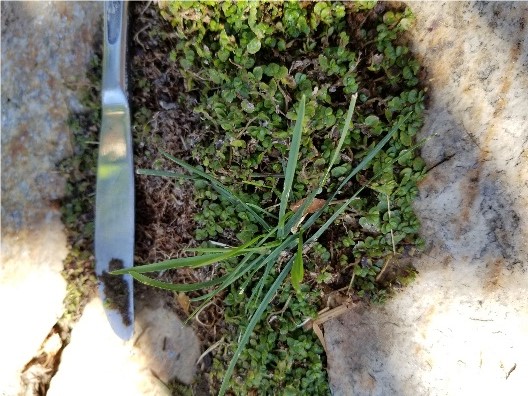
I have included 3 examples of weeding that recently required teasing in my garden. I always refer to the ground cover plants as conspiring plants as they seem to delight in hiding offensive weeds until they grow into maturity.
You know, if using grandma’s sterling dinner knife seems disrespectful, drop by a thrift store and pick up a strong stainless steel model, but watch out for impulse buying!
Stan, The Tool Man
|
 |
 |
| Spurge in Dimondia |
Australian violets in baby tears |
Grass in baby tears |
