by Stan Logan | Feb 19, 2022 | Plant labels
I prepare plant labels for both the Sacramento Iris Society and the Sacramento Perennial Plant Club. The labels for the Iris Club are cut to around 10 inches and are made of aluminum. The labels for the Perennial Club are cut to 5 inches and are made of plastic. We have found that plastic is easier to write on, and these labels always have a lot in information on them.
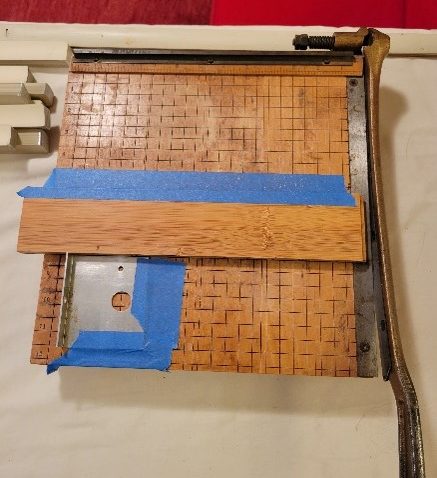
Now, I have shown below the two devices I use for label preparation. You can see the metal stop that is taped to the guillotine table. The length to which metal blinds are cut depends on the distance between the cord holes in the blinds.
After the blinds are cut to desired length, I tape a bunch together, and round the corners on an inverted belt sander. The bunches of the same length are then washed in a bucket with a dish washing solution. Then comes the fun part when I dry the labels while watching TV. The last label drying event was Sunday while watching the Super Bowl.
So, you see, someday I may have to pass this duty to another person. LaVille has refused. I really like making labels, and I am hoping there is someone out there who will take over this enjoyable task in the future.
Stan, The Blind Man (mini, that is)
Cutting Board used to right-size blinds into plant labels
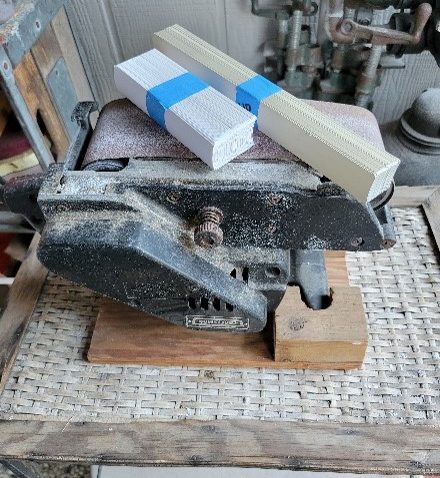
Plant labels made from blinds
by Stan Logan | Feb 19, 2022 | Container plants, Garden tools, Propagation
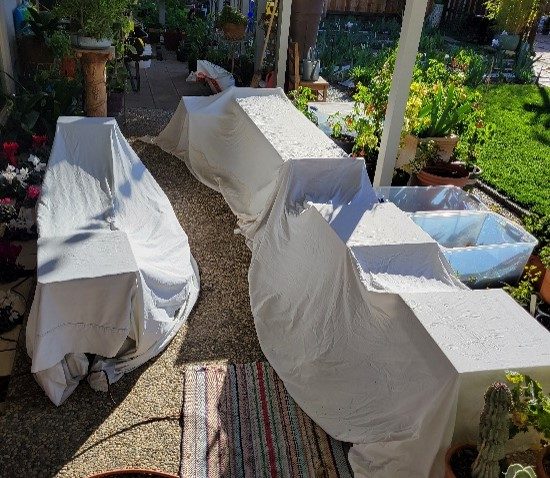
With the advent of a freeze forecasted for the 22nd, I thought it timely to remind you to protect your tender plants. Although there are special sheet-like products available, old bed sheets will work fine. Got no old sheets? Then plan on going to estate sales. They are a sure find. In the photos below I have placed old X-mas tree lights (estate sales again) beneath the sheets. These maintain a temperature above 50 degrees through the night to protect the abutilon seedlings that are growing for future sales. If you plan on using plastic sheeting, don’t let the plastic touch the plants.
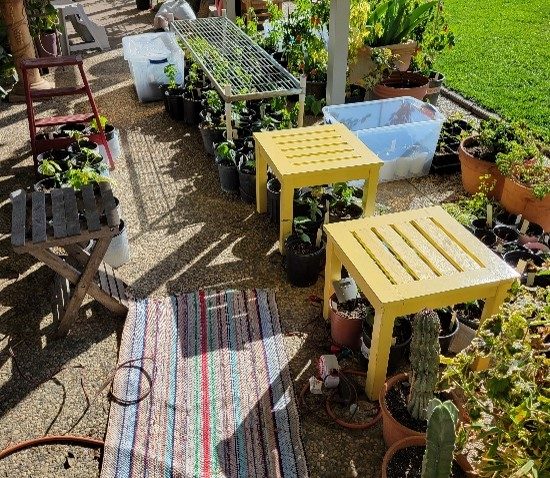
I just went outside to take a photo of the plants that the sheets were protecting. The abutilons have really grown well through the winter for the last 3½ months since cutting. We lift off the yellow tables each morning. A timer controls the lights, and that rug is a deterrent from tripping over the cords. The south exposure creates an extra 10 degrees of air temperature, and the pots most exposed to the sun are wrapped with white bubble wrap.
Stan, The Propagation Systems Manager Man
by Stan Logan | Feb 19, 2022 | Propagation
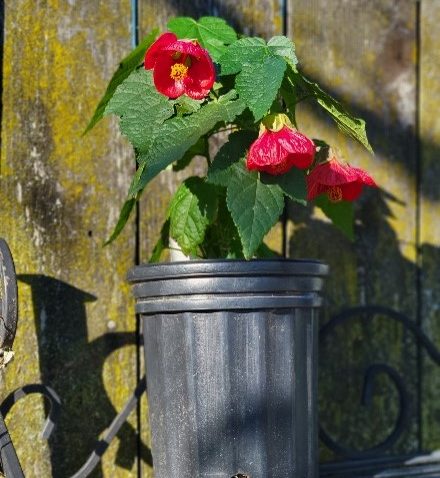
| Just look at thia photo. Can you not fall in love with a beauty like this? This abutilon is growing from a cutting obtained from a small tree growing in a friend’s back yard. This particular variety is a miniature that typically grows to about 18 inches, but in Sharon’s yard it has stretched up to four feet in search of more light. LaVille so loves abutilons that she is propagating 10 different varieties. These are practically the only outdoor plants that she is working with in preparation for club sales. Instead, she is growing many different indoor plants with an emphasis on begonias, hoyas, and peperonias since these plants are easy sellers.
Look for LaVille at the next Perennial Club sale. She is willing to share the love with you.
Stan, The Lover Man |
Abutilon |
by Stan Logan | Feb 18, 2022 | Container plants, Irrigation
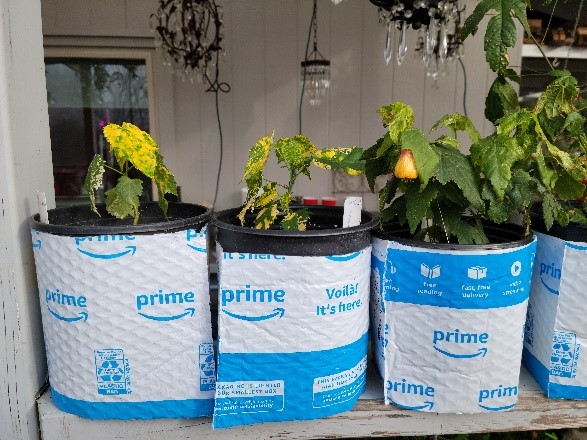
| Growing plants in those ubiquitous black gallon pots can pose a problem. Some plants prefer full sun exposure. However, intense sun rays are absorbed by the black plastic surface and converted into heat. When the planting soil within get hot, root damage results. One solution to this dilemma is to line the insides with bubble wrap. A much easier solution is to shield the outside. I have found the perfect heat barrier. Amazon sends a lot of its items in white bubble wrap pouches. The most common size they use fits around a gallon pot perfectly. If you cut the bottom off and cut the height in half to about 6 ½ inches, you will create tubes that will easily enclose two pots, keeping them cool, and yet allowing the full exposure of the sun to your happy plants. This technique creates a reusable shield that will postpone recycling and most certainly prevent deposit in the local landfill. If you are receiving Amazon Prime delivery pouches and have no use for them, we could certainly use them. LaVille, for instance, transferred 30 abutilons into gallon pots today. However, LaVille says I can’t order more stuff from Amazon just to get more bags.
Stan, The Reusing Man
P.S. I measured the temperature of the soil 1 inch from the edge of a shielded and an unshielded pot today at 3 PM. Shielded – 74 degrees Unshielded – 94 degrees. These are the results at the end of January. Imagine the results in August!
P.P.S. If the sight of all the advertising bothers you, turn the tubes inside out, but I’m not sure the shields will be as effective. I’ll test that out tomorrow and send you another email if there is significant difference. |
Bubble-wrapped pots |
| |
|
by Stan Logan | Feb 18, 2022 | Garden tools
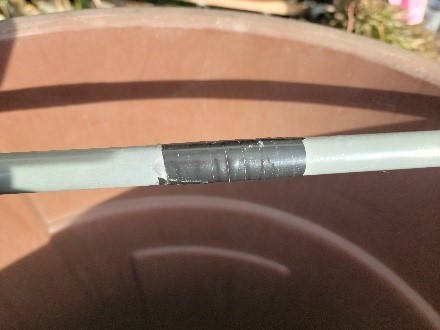
Figure 1 – Repaired Aluminum Wand |
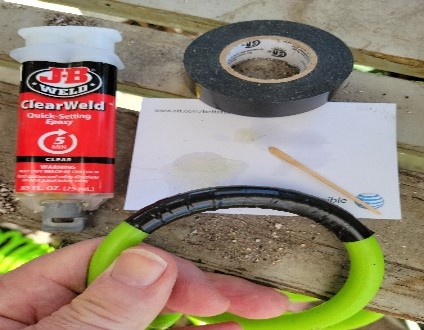 Figure 2 – Failed Leak Repair |
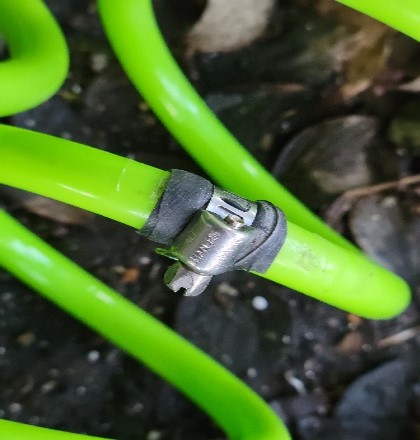 Figure 3 – Successful Leak Repair |
Have you ever had a problem that you were unable to solve? . . . Don’t you lie to me! Of course, that has happened. Although failure can be frustrating and disappointing, I think it’s a healthy option to simply accept the fact that you cannot succeed at everything you attempt. That scenario occurred recently when a leak appeared in the coiled hose that LaVille loves. (Not my sentiments, by the way.)
Since I had had success stopping the leak in an aluminum spray wand using epoxy (Fig. 1), I tried the same technique on her hose spreading an ample amount of epoxy over the area before taping. I was so sure it would work that I laid out the materials to be included in the photo (Fig. 2) for your information. I use JB Weld Epoxy so frequently that I just leave it out on my work bench.
Note in the photo that I mix the epoxy on a sticky pad with a toothpick and then simply tear off a sheet the next time I do a repair. Good idea, huh? Anyway, since both the electricians’ tape and epoxy were flexible, I thought the mend would work. Nope. Well, I thought a perfectly acceptable option would be to simply buy another hose, but when I attempted to uncouple the hose, it was really frozen at a union with mineral deposits. So, after that failure, I attacked the leak again with a tightly wrapped strip of bicycle inner tubing and a hose clamp (Fig. 3). The fix was a success this time, but only after failures.
I guess I’m sending a mixed message. I was willing to accept failure and go buy another hose, but the failure to be able to do that forced me to fight on until success was reached. In any case, I encourage you to think about using JB Weld for your repairs. and do your mixing on a sticky pad. But whatever problem you attempt to solve, be willing to accept failure as an option.
Stan, The Sometimes-Failing Man