by Stan Logan | Feb 18, 2022 | Container plants, Irrigation
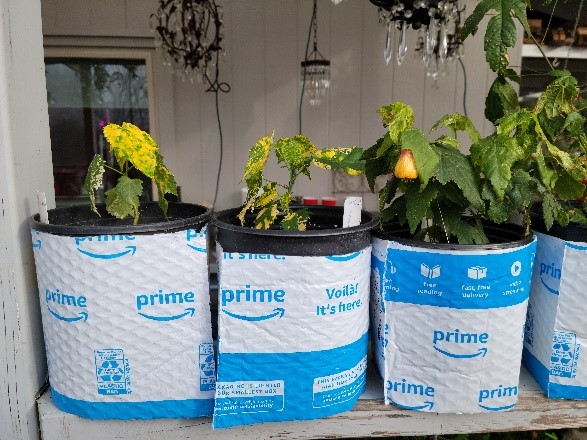
| Growing plants in those ubiquitous black gallon pots can pose a problem. Some plants prefer full sun exposure. However, intense sun rays are absorbed by the black plastic surface and converted into heat. When the planting soil within get hot, root damage results. One solution to this dilemma is to line the insides with bubble wrap. A much easier solution is to shield the outside. I have found the perfect heat barrier. Amazon sends a lot of its items in white bubble wrap pouches. The most common size they use fits around a gallon pot perfectly. If you cut the bottom off and cut the height in half to about 6 ½ inches, you will create tubes that will easily enclose two pots, keeping them cool, and yet allowing the full exposure of the sun to your happy plants. This technique creates a reusable shield that will postpone recycling and most certainly prevent deposit in the local landfill. If you are receiving Amazon Prime delivery pouches and have no use for them, we could certainly use them. LaVille, for instance, transferred 30 abutilons into gallon pots today. However, LaVille says I can’t order more stuff from Amazon just to get more bags.
Stan, The Reusing Man
P.S. I measured the temperature of the soil 1 inch from the edge of a shielded and an unshielded pot today at 3 PM. Shielded – 74 degrees Unshielded – 94 degrees. These are the results at the end of January. Imagine the results in August!
P.P.S. If the sight of all the advertising bothers you, turn the tubes inside out, but I’m not sure the shields will be as effective. I’ll test that out tomorrow and send you another email if there is significant difference. |
Bubble-wrapped pots |
| |
|
by Stan Logan | Jan 15, 2022 | Container plants, Garden tools, Irrigation
You know, it’s not easy coming up with a new tool to write about, but I am really excited about this one. As soon as I saw LaVille use it, I just knew there must be at least two other gardeners out there who would appreciate this one. If you are like my wife, she uses a watering wand almost daily. You see, she has probably around 100 potted plants that are under cover outside that don’t get the benefit of rain showers. So even in the winter, a watering wand is used regularly. The last wand was good—until it wasn’t. A crack appeared in the side of the aluminum shaft that caused LaVille to get sprayed along with the plants. I found that applying J-B Weld epoxy to the area, and wrapping with electrician’s tape sealed the leak. LaVille was still unhappy because . . . well, the wand was too long, the control valve was sticking, and the spray was irregular.
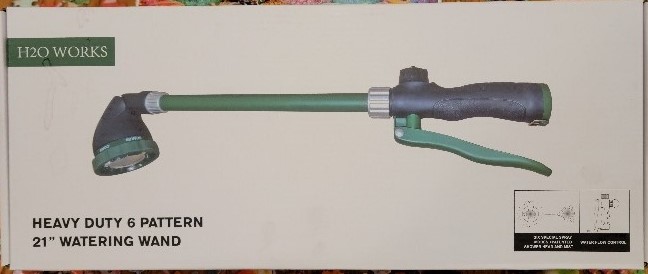
So I went to Amazon and ordered what you see below. This, in her opinion, is the perfect watering wand. Adjustable sprays, adjustable head direction, full and fine spray, and a short handle which can still reach higher up hanging plants and water a potted plant held in the other hand. (The full spray is emitted from around 200 minute holes!)
If you cannot read the description from the photo, I am talking about “H2O heavy duty 21 inch Watering Wand” from Amazon.
Happy watering,
Stan, The Tool Man
by Stan Logan | Nov 23, 2021 | Container plants, Irrigation
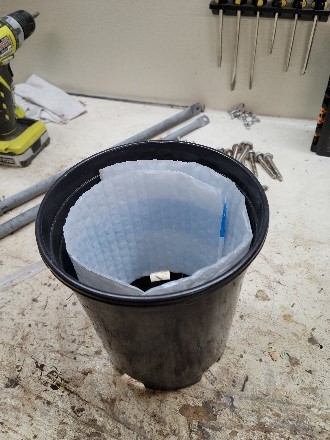
Cindy Eastman has her own method of dealing with hot pots. She lines the inside of her gallon pots with bubble wrap. If you are like me (sorry), you have a number of bubble wrap delivery pouches laying around waiting to be stuffed into the recycle bin of your local store. Consider re-using the plastic by cutting the bags into strips that can be wound around the inside of your black plastic pots. If you would like to show your gardening friends how clever you are, cut the strips a little wider so that they show above the soil level. I’m sure their curiosity will lead to fascinating conversation.
Stan, The Re-user Man
Bubble wrap lining a garden pot
P.S. The pot pictured looks quite tapered, but it is just the angle of the camera. I appreciate those of you who have been responding to my blogs. It often gives me ideas for future articles.
by Stan Logan | Nov 12, 2021 | Container plants, Irrigation
I suspect that many of you are growing plants in black plastic pots. The reason, or course, is that they are free. Whether they are small 4 inch square pots or 3 gallon round ones, there is always a free source for these containers. My main source is the Redwood Barn nursery in Davis. Customers constantly return used pots to the nursery for re-use. My concern is that you remember that these black pots are easily heated by the sun, and root damage can result. Even though the sun’s rays are less intense in the Winter, the rays are coming in at a lower angle and strike the sides of your pots more directly. The air is cooler now, but the sun can still release a great deal of heat into the soil of your potted plants.
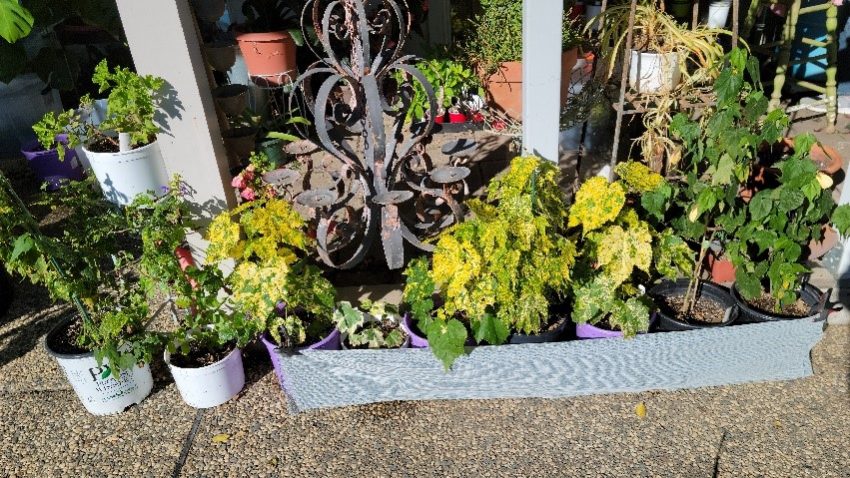
If you are growing plants that prefer full sun, you can still use various techniques to shade the pots. I’ve shown one of these below where I have clamped shade cloth in front of the black pots. Hopefully you have a more esthetic technique in practice. Notice that the white pots on the end have no sun shield because they naturally reflect the sunlight and don’t convert it into heat. So, if you wish to avoid the whole problem, use white pots. I noticed that Amazon has a great selection from 3 inch to 7 gallons. White pots show plants better anyway, don’t you think?
By the way, LaVille plants most of her “mother” plants for propagation in white pots—pots that will not go to sales by accident.
Stan, The Cool Man
White pots and shielded pots
by Stan Logan | Jun 17, 2021 | Irrigation
I have been trying to be able to write a comprehensive article about drip systems. I began with a list of a half dozen mistakes that I have made. I then thought I could add to my list of suggestions by viewing a few YouTube videos. Well, this went on for hours. I ended up with 2 full pages of notes. It was then that I realized that there is too much information to put into a single article. No one is going to read an article pages long. So, instead, if you are truly interested in creating a drip system, you need to do your own research. The best single YouTube program I found can be reached by googling “YouTube Drip System Watters Garden Center”. Now there are 3 videos—view the 2015 version. This is a program put on by the owner of a nursery in Prescott, AZ. He will give you a lot of practical information. If you are not yet saturated with him, simply Google “YouTube Drip Irrigation” and check out more videos.
Now I will try to add ideas that you may have missed:
If you have distance separated plants, for instance potted plants, then using drip emitters is wise. If you have plants densely planted or areas of ground cover, then using mini sprayers would be better. You cannot use drippers and sprayers on the same system. If you choose sprayers, you need to see me before buying items. I will get you started right.
Whatever system you use, try to buy parts made by the same company so they are compatible. Rain Bird seems to be the most common drip system brand. I just checked out at Home Depot, and that seemed to be just about all they carried—which was a lot! I particularly suggest buying the Rain Bird ½” couplers because they will handle all the various brands of “half inch” delivering tubing that will vary a lot in size. But order your ¼ inch delivery tubing from Amazon: “MIXC ¼ inch Blank Distribution Tubing Drip Irrigation Hose”. This is superior product. Attach the ¼ tubing to the barbed coupling first before insertion and grab the coupling with pliers to give you more leverage when forcing the coupling into the ½ inch delivery tube.
I’m going to assume that you are going to hook to a hose bib. If that bib is attached to your house, make sure it’s not delivering softened water—not a good thing. If you are buying connectors that are threaded, remember that pipe thread and hose thread are different.
If you have plantings that are lined up like in a vegetable garden, your best bet would be the tubing that contains inline pressure compensating emitters. Limit ¼ inch line runs to 25 feet. ½ inch lines can go hundreds of feet. I recommend these inline emitters over rubber soaker hose or T-tape. Run your inline system first before planting so you can see where the moist soil will be.
You barely need to cover delivery tubing if you choose to. Sun exposed tubing will last for 10 to 15 years. Then too, covered tubing won’t be tripped over. Leave the ends of lines exposed or at least located so they can be found and opened for flushing once a year. Also, flush out a line before using it the first time.
You can make staples to hold down tubing out of wire coat hangers. I can do this for you.
You will have to have different systems for trees and shrubs vs. flowering plants. One system is for infrequent deep watering and the other is for more frequent short watering.
Set your timer to water very early in the morning, but occasionally run the system briefly while you are out there to detect problems.
Plan on expanding your system as you do more planting and as plants get bigger and need more emitters surrounding them.
Don’t forget to buy a backflow preventer, timer, filter, pressure regulator and a Y splitter with valves so you can still attach a hose at the hose bib.
Good luck! Stan (You may simply call me Dr. Drip.)
by Stan Logan | May 27, 2021 | Container plants, Garden tools, Irrigation
With all the pandemic caused emphasis on home improvement, this would have been a good article to write a year ago. Better late than never. As usual, wanting to advise others comes as a result of mistakes I have made, some of which are described below.
Size: Length can be whatever you want. Width, however, should be no more than 4 feet. I have 3 beds that are 5 feet by 8 feet and it is difficult to do any work near the center of the beds. The one 4 footer is so much easier. The walls of my beds are made with three 2 x 6’s, so they are about 18 inches high. Now that I think of it, 24 inches would have been much better in terms of having to bend over less. But then, I think proportions look better at 18”—you gotta look good even if it’s painful. The higher you raise the box, the stronger the support needed to keep boards from bowing out if they are long. People use raised beds to make tending them easier and to create an enclosure for the new improved soil that can be brought in that, hopefully, plants will love. Most people find that a bed 10 or 12 inches high works well for them—not so much for growing tomatoes which are best planted 18 inches down.
Materials: Most people use wood. Redwood is probably the best. When you are picking out your 2-by boards, try to find those that have the most heartwood. The reddish heartwood is far more resistant to rot than the pale sapwood. Cedar is another good choice. Pressure treated wood is more controversial. No arsenic has been used in this wood since 2003-4. Currently 2 different copper compounds are used and although no traces of these chemicals have been found in either soil or vegetables, pressure treated wood is not recommended for planter boxes in which food is grown. You can alleviate you fears by lining the box with heavy plastic—say 6 mil. You can also seal the box with paint or another kind of sealer. One caution—avoid breathing the dust when cutting pressurized wood. Wear a mask. I know you know how to do that. More expensive, but far more durable is construction with masonry. There are all kinds of attractive alternatives here. The drawback is that you have to lean over farther to work with your plants and the material is not gentle on elbows and knees
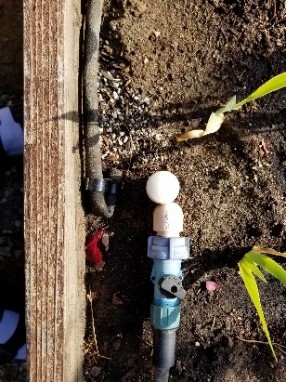
Misc. Plan ahead and bring irrigation lines up into the box. Cover the bottom with hardware cloth—you know, the substantial ¼” wire mesh, to keep varmints out. A layer of weed cloth will also discourage the invasion of roots from a nearby tree. Trust me—tree roots will love the great soil and water you have provided. If you are using wood, consider installing flat boards on the top edges for ease of sitting. Don’t just use screws to hold lumber together. Use lag screws, or better yet, use bolts with washers. If using lag screws, predrill to prevent splitting. You can attach a band of copper mesh around the outside to keep snails and slugs out—but not earwigs. Finally, as you can see below, if you use treated posts, you have to add preservative, sealer, or a cap to cuts that have exposed untreated interior areas.
In-box irrigation |
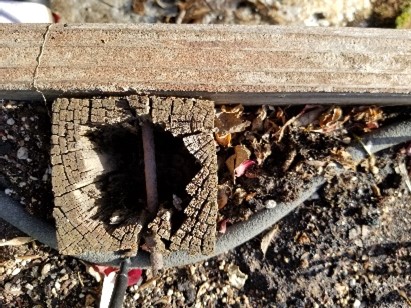 Rotting post |
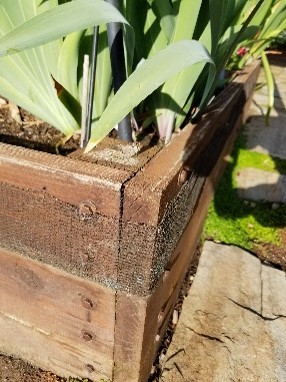 Copper mesh |
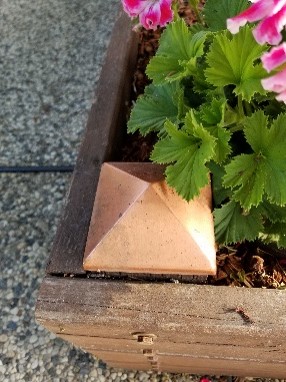 Post cap |
Why does most of my learning have to come at the expense of mistakes I have made?
Stan, The Blog Man
