by Stan Logan | May 31, 2021 | Garden tools
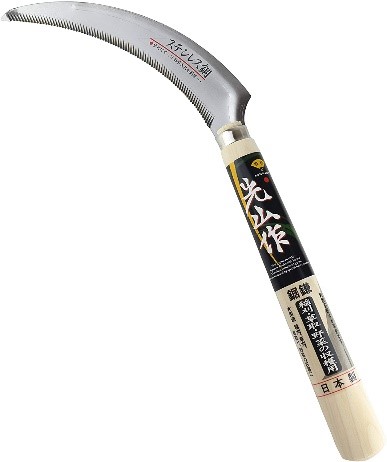
Here is a tool via Anita Clevenger. The Japanese grass sickle saw is an inexpensive tool that will really save you a great deal of time when it’s time to cut back your ornamental grasses. There are many models, but the one Anita bought at Home Depot is unique in that the inner blade is a fine-toothed edge that is extremely sharp—I mean really, really sharp. Wear a substantial glove with the hand you use to grab a bunch of grass and slice off that bunch with a careful quick pull. The one model I found on Amazon with a finely serated edge is the “Hounenkihan Japanese Grass Sickle Saw” and runs $16.99. Remember to count your fingers when you finish the job. You may have left something behind.
Stan, The Tool Man
Japanese grass sickle
by Stan Logan | May 27, 2021 | Container plants, Garden tools, Irrigation
With all the pandemic caused emphasis on home improvement, this would have been a good article to write a year ago. Better late than never. As usual, wanting to advise others comes as a result of mistakes I have made, some of which are described below.
Size: Length can be whatever you want. Width, however, should be no more than 4 feet. I have 3 beds that are 5 feet by 8 feet and it is difficult to do any work near the center of the beds. The one 4 footer is so much easier. The walls of my beds are made with three 2 x 6’s, so they are about 18 inches high. Now that I think of it, 24 inches would have been much better in terms of having to bend over less. But then, I think proportions look better at 18”—you gotta look good even if it’s painful. The higher you raise the box, the stronger the support needed to keep boards from bowing out if they are long. People use raised beds to make tending them easier and to create an enclosure for the new improved soil that can be brought in that, hopefully, plants will love. Most people find that a bed 10 or 12 inches high works well for them—not so much for growing tomatoes which are best planted 18 inches down.
Materials: Most people use wood. Redwood is probably the best. When you are picking out your 2-by boards, try to find those that have the most heartwood. The reddish heartwood is far more resistant to rot than the pale sapwood. Cedar is another good choice. Pressure treated wood is more controversial. No arsenic has been used in this wood since 2003-4. Currently 2 different copper compounds are used and although no traces of these chemicals have been found in either soil or vegetables, pressure treated wood is not recommended for planter boxes in which food is grown. You can alleviate you fears by lining the box with heavy plastic—say 6 mil. You can also seal the box with paint or another kind of sealer. One caution—avoid breathing the dust when cutting pressurized wood. Wear a mask. I know you know how to do that. More expensive, but far more durable is construction with masonry. There are all kinds of attractive alternatives here. The drawback is that you have to lean over farther to work with your plants and the material is not gentle on elbows and knees
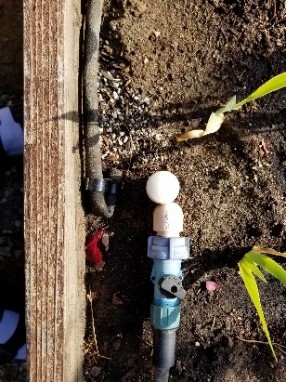
Misc. Plan ahead and bring irrigation lines up into the box. Cover the bottom with hardware cloth—you know, the substantial ¼” wire mesh, to keep varmints out. A layer of weed cloth will also discourage the invasion of roots from a nearby tree. Trust me—tree roots will love the great soil and water you have provided. If you are using wood, consider installing flat boards on the top edges for ease of sitting. Don’t just use screws to hold lumber together. Use lag screws, or better yet, use bolts with washers. If using lag screws, predrill to prevent splitting. You can attach a band of copper mesh around the outside to keep snails and slugs out—but not earwigs. Finally, as you can see below, if you use treated posts, you have to add preservative, sealer, or a cap to cuts that have exposed untreated interior areas.
In-box irrigation |
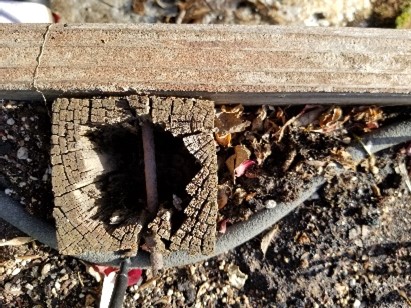 Rotting post |
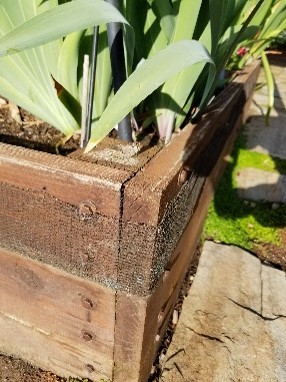 Copper mesh |
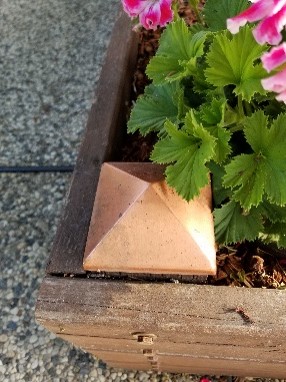 Post cap |
Why does most of my learning have to come at the expense of mistakes I have made?
Stan, The Blog Man
by Stan Logan | May 21, 2021 | Garden tools, Irrigation
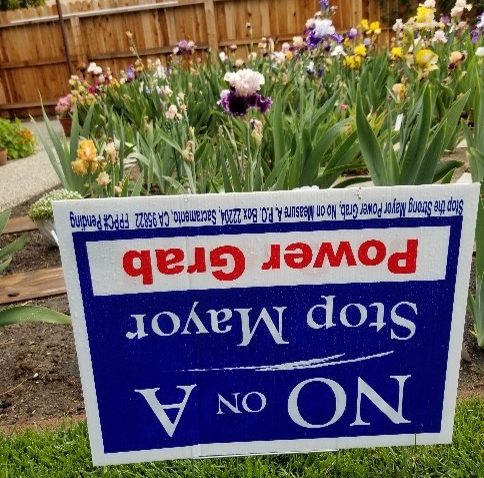
I recently had a newly cultivated area that I wanted to let dry out until planting. I used 2 political signs to ward off the spray from 2 sprinklers and they really worked well. By cutting off all but 6 inches from the supporting wire of the sign, you can poke it into the ground and move the shield wherever you want. The sign is made of corrugated plastic so it is impervious to water. On the other hand, you might want to shield certain plants from harsh sun rays. When not in use, these flat shields store efficiently.
As you know these signs are readily available when political issue are made public. You can either wait until issues are settled, or simply pick up the signs when they don’t agree with your viewpoint. ( My editor says I can’t say that.)
Stan, The Blog Man
Repurposed political signs as garden shields
by Stan Logan | Apr 22, 2021 | Garden tools
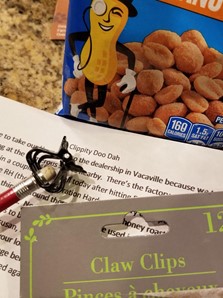
LaVille and I like to take our Hyundai into the dealership in Vacaville because we take two cars and we spend the hours shopping at the numerous stores nearby. There’s the factory stores, Target, Lowes, and many, many more all within a couple miles. Well today after hitting Eddy Bauer, Lowes (several geraniums and great bougainvillea), the RH (the new Restoration Hardware—very disappointing), and Target, we came across a Dollar Tree. The one thing we found there (other than the honey roasted peanuts and the Hot Tamales) was a package of Claw Clips. Normally these would be used in your hair (not my hair), but we have found these tiny spring-loaded clips to be really useful in the garden for supporting delicate vines—like peas, clematis, passion vine, black-eyed susan, hardenbergia, honeysuckle, and morning glory. So if you are into vines like we are, I suggest you visit your local Dollar Tree and seek out a package of Claw Clips—12 for a dollar. If you find a photo of a clip below, I was able to figure out how to transfer a photo from my phone to a document. If no photo, I failed again.
Stan, The Rambling Man
P.S. Don’t forget the peanuts! |
Dollar Store Claw Clips |
by Stan Logan | Apr 11, 2021 | Garden tools
I would hazard to guess that you have either a can of WD-40 or a can of silicone spray, or both, in your arsenal of improvement products. Which of these is better? Let me give you my opinion. (If you don’t want it, stop reading.)
The term “WD-40” is derived from the fact that the aerospace company developing this product was trying to find a chemical that would displace water—thus “WD” stands for water displacement. As it happens, WD-40 was the 40th formula that was finally successful in keeping water away from the skin of the Atlas rocket and preventing corrosion. I have always found this fact fascinating. (Not so much for you?…Oh well.)
I always include a can of WD-40 in my supply of tool sharpening equipment. Not only do I use it to coat metal to retard rusting, but the spray tends to dissolve the gunk that accumulates on pruners and loppers. (Oven cleaner and a brush really does a thorough job though.) And, of course, it is a lubricant that reduces friction and stops those irritating squeaks. I also just learned from my Flipboard app (A great app for learning the latest news.) that WD-40, being oily, can be applied to wooden handles to reduce the occurrence of splinters. Then, too, if you notice that the rocket in your back yard is starting to corrode, this product is a must.
Now, silicone, on the other hand, is not petroleum based. Therefore it dries and has far less odor for use indoors. Since it dries, it won’t trap dust and dirt. Silicon is therefore ideal for lubricating the tracks of sliding doors and screens, lubricating tracks of drawers, improving the function of padlocks and doorknobs, and stopping the squeaks of door hinges.
On a personal note, I used WD-40 to lubricate the switch on my leaf blower. The blower was set aside on a flat surface and was still plugged to a power cord. While I was doing something else, the blower turned itself on, and since the air intake was blocked, the motor overheated and started a fire. Being a slow learner, I bought the same model of leaf blower again. Since the power switch on this one was sticking like the last one, lubricated again with WD-40. Believe it or not, this resulted in a melted switch. Who’da thought! I had to take the blower apart and hard wire it. Now I have to discnnect the extension cord whenever I want to stop blowing. So apparently it is unwise to use WD-40 on electrical switches.
So in conclusion, I would suggest that you have both of these products. Use WD-40 where you want to leave an oily surface, and use silicone where you want to lubricate but leave a dry surface.
Stan, The Slow Learning Man
by Stan Logan | Apr 7, 2021 | Garden tools, Irrigation
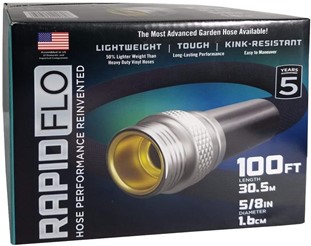
I’ve taken a chance here. While walking the isle at Costco, I spotted a pallet of boxes of garden hoses—RAPIDFLO 100 ft length, 5/8 inch diameter, lightweight, tough, kink-resistant. You see, LaVille has been wrestling with a rubber hose that has become stiffer with age. (What’s new?) She has had to drag it through the main iris garden and then wind it back up on the hose reel when done. So I uncoiled the old, stiff hose off the reel. Actually it now remains permanently coiled along the side yard. I then attached this new hose to the spool and turned on the pressure. I could see that LaVille at the far side of the yard was now watering with less than expected flow. Not only did the 100 foot length impede the flow, but the 5/8 inch hose itself was perhaps still somewhat flattened. Maybe continued use will expand it—probably not. Perhaps the company should change it’s name to SLOFLO. But LaVille says that the gentle spray was actually desirable. Anyway, when LaVille was finished watering, I had her close the spray wand valve to keep the hose turgid, and wound the hose up on the reel. You don’t want a flattened hose on the reel. That would really limit flow. The winding task was truly easy to do because the hose is really lightweight.
So, do I recommend this hose? The jury is still out at our house. I would say that if you are tired woman handling (Is that sexist?) an old, heavy hose around, this may be the hose for you. You can easily coil the hose in a large pot if you don’t have a reel. I am going to assume that this hose design is less likely to leak as the expandable hoses tend to do. Keep in mind that this is 100 feet of hose. It seemed a little long for my yard that is only 80 feet wide. As of 3/20/21, this hose if available at Costco for $39.99. If you miss it there, Amazon has it for $55 (Yikes!).
Happly hosing,
Stan, The Tool Man
RapidFlo Hose
