Got Knitting Needles?
It has been a long time since I sent out a blog. No one has complained, but I will ignore the possible inference.
I just watched a video on TikTok (yes, I watch TikTok a lot). It showed another technique for testing the moisture content of a potted plant. Ya know how you stick a toothpick into a cake that you are baking to see if it is done. If stuff sticks to the tooth pick, you know it needs to go back to the oven. Now I have never done this myself, but LaVille seems to relish this procedure. Anyway, if you stick a knitting needle into a potted plant, where soil sticks to it upon removal tells you the depth of the moisture. I know I have touted the use of moisture meters, but I have found that the soil texture can vary the results. Besides, here is something new for you to experiment on. (Don’t you just hate it when a sentence ends in a preposition?)
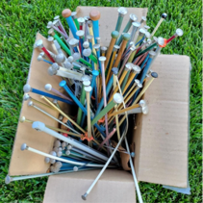
As you can see, I have quite a collection of knitting needles. I bought this batch probably 30 years ago at a garage sale for a little bit of nothing. Other than using several pairs to teach the grandkids to knit, none of these has been used by us because we prefer circular needles. (You should see some of my scarves.) So, if the box appears dusty, it’s because it’s been in the attic all these years.
Stan, The Knitting Man